Building a gaming PC can be a daunting task. However, with the right tools and advice, it can be an easy and fun process. The first step is to choose your components. When choosing your components, keep in mind the games you plan to play and the system requirements for those games. You’ll also want to make sure that your components are compatible with each other.
The next step is to install your components. This step can be a little tricky, so it’s important to read the instructions carefully. Once your components are installed, it’s time to install Windows 11 on your new gaming PC and configure it. This involves setting up your operating system and installing the necessary drivers for your hardware.
Finally, it will be time to test your gaming PC. Start by installing one of your favorite games and testing its performance with a benchmark tool or examine by FPS counter like MSI Afterburner.
Important Tools Required to Build a Gaming PC
Building a gaming PC can be an extremely rewarding experience, but it can also be very challenging. There are a number of important tools that you will need in order to build your own gaming PC.
- The most important tool is a screwdriver. You will need it to install the motherboard, the graphics card, and other components.
- You will also need a tool to open the computer case. Many cases have screws on the back that need to be removed in order for you to access the internal components.
- A third tool that you may find useful is a voltage tester. This tool can help you ensure that your power supply is providing the correct amount of voltage to your components.
In addition to basic tools, there are some key tools you will need to make the process of building a gaming PC, as smooth as possible. You will need a good set of wire strippers and zip ties to secure your cables in the end.
This is important since you will want to be able to easily identify which cable goes where. Secondly, an anti-static wrist strap is a must, as static electricity can damage your components. Finally, it’s important to have a designated workspace where you can comfortably and safely work on your build.
Important Parts to Build a Gaming PC
- 1. PC Case: A chamber that house every gaming hardware to complete a gaming system.
- 2. Gaming CPU: The central processing unit that functions as the brain of a computer for all tasks.
- 3. Motherboard: A motherboard is a skeleton that connects every PC part like a nervous system.
- 4. RAM: The random access memory which randomly fills data and apps files for quick loadings.
- 5. GPU: The powerhouse for every graphical task like rendering, editing, and gaming applications.
- 6. SSD/HDD: Storage containers are used to fill with digital copies of files to keep a small footprint.
- 7. Power Supply: PSU is like a heart and pumps current to all components and converts AC to VDC.
- 8. CPU Cooler: Keeps the processor cool during work loads and dissipates heat continuously.
- 9. Thermal Paste: A medium sits between the CPU and cooling system to efficiently transfer the heat.
- 10. System Cooling: Just like home ventilation, PC fans exhaust hot air to reduce temps.
- 11. Peripherals: Input and output accessories for the system interactions and actions.
- 12. OS: The interface design for user interactions is called an Operating System.
1. Gaming PC Case
A gaming PC case is an important part of any gaming PC build. Cases come in a variety of shapes and sizes, with each one designed to house different components and offer different features. When choosing a gaming PC case, it’s important to consider the types of components you’ll be using, as well as the size and shape of the case.
There are a few things to look for when choosing a gaming PC case. The first is the size and shape of the case. Computer chambers come in all shapes and sizes, so it’s important to choose one that will fit all of your components. The second thing to look for is cooling. Most PC chassis come with built-in fans or vents that help keep your components cool during extended gaming sessions. Finally, you’ll want to consider the features offered by each case.
Features and Criteria of Choosing Ideal Gaming PC Case
Dimensions And Size
Gamers looking for a gaming PC case must consider more than simply the case’s appearance. The size of the case is also important because it affects how cool the computer runs. A larger case means there is more room for air to circulate, which helps keep the computer cooler.
But most newer PC cases are compact and tiny to fit anywhere on a little desk space, while others are too large and take up too much space. When choosing a gaming PC case, gamers need to consider what kind of hardware they will be using. Some cases only fit certain sizes of graphics cards or motherboards. If a gamer doesn’t choose the right size motherboard or graphics card, may be unable to fit all the necessary hardware in the unmatched PC chassis.
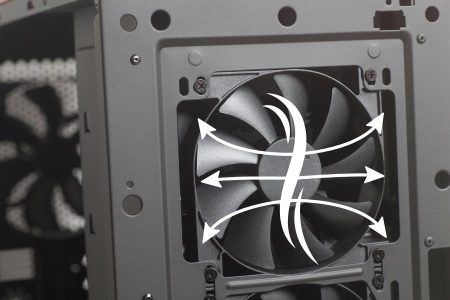
Number of Fans
There are a lot of components that go into a great gaming PC, but one of the most important elements is cooling which necessitates the case fans. A good number of case fans can keep your system running cool and stable, while a bad case fan can lead to overheating and system failure. It’s important to consider the size of the fan when buying PC case fans. The type of fan and the noise level also matter for some folks.
Usually, the size of the fans is related to the housing of the PC case. Most fans have sizes ranging from 80mm to 140mm and come in two types: axial and centrifugal. Axial fans blow air straight out, while centrifugal fans blow air out in a spiral pattern. Centrifugal fans are generally more efficient than axial fans, but they also tend to be louder.
Ports in the PC Case
When you are looking for a gaming PC case, there are a lot of factors to consider and ports are one of the important things that ease user interactions. Usually, motherboard external ports (Rear I/O Ports) are found on the back or sides of the PC case that allow cables to be plugged in. Your PC case should also have some front-side ports, most importantly USB-C, audio input, and output.
Other ports that you may want to consider include USB 3.0 ports, LED lighting controls, RGB colors, and fan RPM controls. These ports can be helpful if you want to connect devices like a thumb drive, external Game recorder, Hi-Fi audio headphones, or external storage device for backups. So, make sure that you get a gaming PC case with enough ports to meet your needs.
Storage Slots
When you’re building a gaming PC, the case is one of the most important decisions you’ll make. And one of the most important features to consider is the number and type of slots for SSDs and HDDs. Some cases have only 2 or 3 slots for drives, while others have 5 or 6. If you plan to use multiple SSDs and HDDs, you’ll need a case with enough slots.
Another thing to consider is the location of the slots. Some cases have them on the front or back, while others put them on the side. The location can be important if you want to keep your cables hidden from view. So which case is right for you? That depends on your needs and budget. But whatever case you choose, make sure it has enough SSD and HDD slots for your needs.
Types of PC Cases
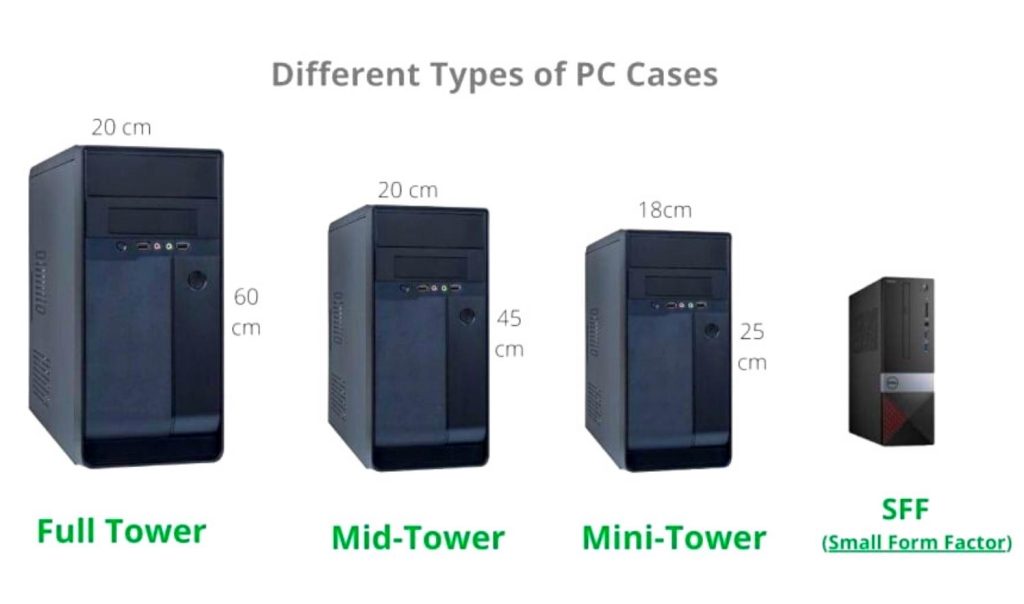
Mini-Tower Cases
The mini-tower case also known as the mini ITX case is an excellent choice for a desktop computer case. It is not too large or small, and it can accommodate many different components. The mini-tower case is also relatively easy to work with, which makes it a good option for those who are not very experienced with computers. Additionally, the miniITX case is often less expensive than some of the other options on the market.
Mid-Tower Cases
As the name suggests, mid-tower cases are in the middle ground between small form factor cases and full tower cases. They’re also known as mico ATX cases and are not as large as full towers. You’ll find enough space for Micro ATX and Mini ITX motherboards, to build an astonishing gaming system that can be built with either a mini-ITX motherboard or MATX motherboard that can be sleek and powerful at the same time. This makes mid-tower cases a good option for people who want more room to work with, without having to deal with a huge case.
Mid-tower cases typically have a variety of expansion cards, storage devices, and cooling options. They also tend to be less expensive than full towers, making them a popular choice for people on a budget. There are a variety of different mid-tower cases available on the market, so it’s important to do your research before you buy.
Full-Tower Cases
When it comes to PC cases, there are a lot of different sizes and types to choose from. But when you need something that can handle a high-end gaming system and plenty of peripherals, you’ll want to go with a full-tower case.
These cases are the biggest around, and they offer plenty of space for powerful gaming components, as well as numerous drive bays and expansion slots. They’re also generally very well-ventilated, which is important for keeping your system running cool. If you’re looking for a case that can handle everything you throw at it, a full-tower is a way to go.
2. Gaming CPU (Processor)
The Central Processing Unit (CPU) is the part of a computer that performs calculations and is the most important factor in determining a computer’s speed. CPUs are made up of transistors, and the number of transistors that a CPU has will determine its speed. In basic terms, the faster a CPU can execute computations, the faster your computer will be, even if it is equipped with a powerful GPU.
There are three basic types of CPUs to consider while looking for an appropriate CPU: Gaming CPUs are classified into three types: budget, mainstream, and workstation. The budget CPU is designed for individuals on a restricted budget who cannot buy a more costly CPU. The standard CPU is designed for individuals who wish to have a nice gaming experience without spending a lot of money. The workstation CPU is designed for individuals who want the highest performance available for professional gaming.
Despite the fact that all of the varieties have multicore CPUs and are quicker at the most demanding jobs, such as gaming. You may choose any type based on your budget. Aside from the processor classification, there are several crucial variables to consider when selecting a gaming CPU. The number of cores and threads, clock speed, cache size, and TDP are all crucial factors to consider. The number of cores and threads impacts how well the CPU can manage several tasks at once.
Important Things to Consider for Gaming Processor
CPU Cores
A processor core is a processing unit in a microprocessor. More cores mean more independent tasks that the processor can handle at once. Having multiple cores allows a processor to split up big tasks into smaller parts that can be processed simultaneously, improving performance. Many software applications are designed to take advantage of multiple cores, so having more cores usually means better performance with those applications.
Not all processors have the same number of cores. Some high-end processors have more than 16 cores, while some low-power processors have just quad cores. If you’re not sure how many cores your processor has, you can check the specifications or use a CPU benchmarking tool to find out.
CPU Threads
One of the many benefits of a multi-core processor is the ability to equip multiple threads. These threads can run a sequence of instructions that can be executed independently of other threads. By splitting the work among multiple threads, a multicore processor can achieve better performance.
The number of threads that can be run simultaneously on a multicore processor depends on the number of cores and the type of application. For example, some applications can use all the cores while others may only use two or three cores. In general, more threads can improve performance if there is enough work to keep them all busy.
Threads are also beneficial because they allow the processor to start executing instructions while waiting for data from memory or other devices. This feature, called instruction pipelining, can improve performance by keeping the pipeline filled with instructions.
CPU Clock Speed
CPU clock speed is a measure of how many instructions per second the central processing unit can execute. Clock speeds determine how fast the CPU can complete tasks and are usually expressed in gigahertz (GHz). A higher clock speed allows the CPU to complete more instructions per second, which results in faster performance. However, other factors such as the number of cores and the type of processor also affect performance.
Over the years, CPU clock speeds have increased significantly. However, due to limitations in cooling technology and power consumption, current processors are limited to a maximum clock speed of around 5 GHz. In order to achieve even higher performance, manufacturers have begun to incorporate multiple cores into their processors. This has allowed them to achieve clock speeds of up to 8 GHz while still maintaining a reasonable power consumption.
CPU Cache Size
CPU cache size is an important factor to consider when choosing a new computer processor. Larger CPU caches can improve performance by reducing the number of times the processor has to access data from RAM. This is because the processor can access data that is stored in the CPU cache faster than data that is stored in RAM.
Most desktop processors have a CPU cache size of between 2 and 8 megabytes. However, some high-end desktop processors have a CPU cache size of around 32 megabytes. Laptop processors typically have a smaller CPU cache size than desktop processors. The smallest laptop processors have a CPU cache size of 1 or 2 megabytes, while the largest laptop processors have a CPU cache size of 8 or 16 megabytes.
CPU TDP
CPU TDP stands for Thermal Design Power. It is a value that specifies the maximum amount of heat that the cooling system in a computer must dissipate. The CPU TDP is usually expressed in watts. The CPU TDP is used to help manufacturers determine how much power they need to supply to the CPU and cooling system. It also helps them determine the size and type of heatsink and fan they need to use.
The CPU TDP can be important because if it’s too low, the computer may not be able to cool the CPU properly and it may overheat. If it’s too high, the computer may not be able to handle the extra heat and may also overheat.
3. Gaming Motherboard
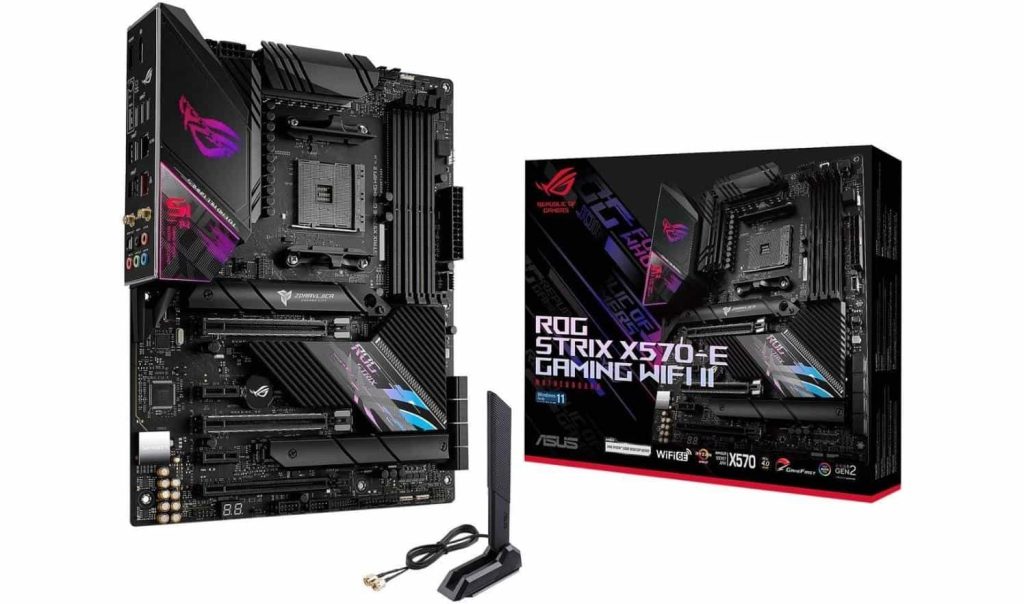
A motherboard is the main printed circuit board in a computer. It holds many of the crucial components of the system, such as the central processing unit (CPU), memory, GPU, and storage. The motherboard has connectors for attaching additional devices, such as video cards, network adapters, and storage controllers.
Motherboards come in a variety of shapes and sizes, depending on the form factor of the system. The most common form factors are ATX and microATX. ATX motherboards are large enough to house multiple expansion cards, while microATX boards are smaller and more suited for smaller systems.
There are a number of factors to consider when choosing a motherboard, including CPU compatibility, chipset features, and socket type. It’s also important to check the specifications to make sure that the board has all of the ports and connectors that you need.
4. Gaming RAM (Memory)
RAM (Random-Access Memory) is a type of computer memory that can be accessed randomly, meaning that any memory location can be accessed without affecting the sequence of locations. RAM is volatile, meaning that it loses its data when power is turned off. When it comes to gaming RAM, you need to be specific for higher performance and higher capacity memory modules.
This means that the higher the Megahertz (MHz), the more speeds it can provide. Not only that, but when your purpose is gaming, you should get at least dual-channel RAM of 16 GBs, since this is the minimal norm for today’s games.
5. The Gaming GPU
The GPUs have come a long way since their early days as co-processors to the CPU. They are now found in almost all desktop and laptop computers and are used for everything from 3D gaming to video editing to cryptocurrency mining.
GPUs are unique in that they can be used for both general-purpose computing and graphics processing. This makes them particularly well suited for tasks like video encoding and decoding, which require both high performance and low power consumption.
GPUs have also become an important part of the cryptocurrency mining ecosystem. Ethereum, one of the most popular cryptocurrencies, is designed to be mined with GPUs rather than CPUs. This is because GPUs are better at performing the complex mathematical calculations required to mine Ethereum.
You should opt for an 8GB VRAM GPU to compete with the current game specifications and fulfil your desire of playing intensive games on your new gaming PC.
Differences Between Types of Gaming GPU
Integrated GPU
Integrated GPUs are a type of graphics processing unit that is integrated into the motherboard chipset. This means that there is no need for a separate graphics card, and the integrated GPU can be used to power the display. The iGPUs are found in many laptops and desktop CPUs, and they are used to improve performance and save space.
The integrated GPUs are not as powerful as a dedicated graphics card, still capable of handling basic tasks such as playing low settings games. In addition, the integrated GPU consumes less power than a dedicated graphics card, so it can be used to extend battery life on laptops.
Some newer laptops come with two different types of GPUs: an integrated GPU and a dedicated graphics card. The integrated GPU is used for basic tasks, while the dedicated graphics card is used for more demanding tasks such as gaming.
Dedicated GPU
A dedicated GPU is a graphics processing unit that is separate from the main processor and memory on a computer. Dedicated GPUs are designed for graphics-intensive tasks such as gaming or 3D design and are often found in high-end gaming computers and workstations.
While many laptops and desktop computers now come with integrated GPUs that share memory and processing resources with the main CPU, a dedicated GPU offers significantly better performance for graphics-intensive tasks. Dedicated GPUs also tend to use more power than integrated GPUs, making them not a good choice for laptops.
6. Gaming SSD OR HDD Storage
Solid-state drives (SSDs) and hard disk drives (HDDs) are two types of computer storage devices. An HDD uses spinning disks to store data, while an SSD stores data on flash memory chips. In general, HDDs are cheaper than SSDs, but SSDs are faster and more reliable.
You can have freedom with a PC to equip both HDDs and SSDs. When you’re looking to buy a new storage device, here are some things to consider.
- If you need a lot of storage space, go for an HDD. They can hold up to 10 times more data than SSDs.
- If you need a fast device, go for an SSD. They’re several times faster than HDDs.
- If you’re worried about reliability, go for an SSD.
7. Power Supply (PSU)
A power supply unit (PSU) is an essential component of a gaming PC. A good PSU will provide clean, stable power to all of the components in your system. This is important for ensuring that your system runs smoothly and without any glitches or crashes.
When choosing a PSU for your gaming PC, you’ll want to consider the wattage rating. The higher the wattage rating, the more power your PSU will provide. You’ll also want to make sure that the PSU is compatible with your motherboard and other components.
Some good brands of PSUs include Corsair, EVGA, and Seasonic. When shopping for a PSU, be sure to read reviews from other customers to get an idea of how well it performs.
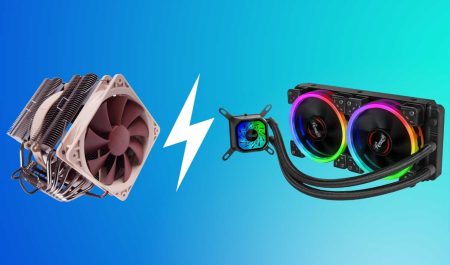
8. Ambient Cooling Support
One of the most important, but often overlooked, aspects of any gaming PC is system cooling. Without good cooling, your system will overheat and eventually crash, resulting in lost progress and frustration. There are a few things to consider when choosing a cooling system and PC fans for your gaming PC.
Fans are the most common type and work well for most systems. While water cooling is more expensive but can provide better performance for high-end systems. Liquid nitrogen is only necessary for extreme overclocking builds. When choosing a PC case, get yourself additional fans that are large enough to fit your case for ambient cooling.
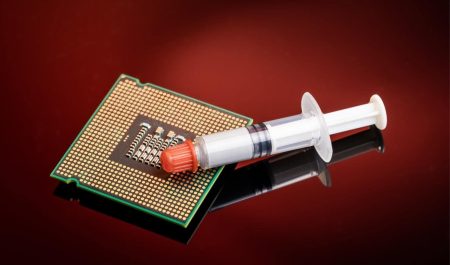
9. Thermal Paste for Gaming Processor
If you are a PC gamer, you know that a stable and optimal gaming experience requires a well-maintained system. One key factor in keeping your PC running smoothly is ensuring that your thermal paste is up to par. The thermal paste helps transfer heat away from your CPU and onto your heatsink, and it’s important to have a quality paste if you want to keep your system cool and avoid any potential damage.
10. Gaming Peripherals and Accessories
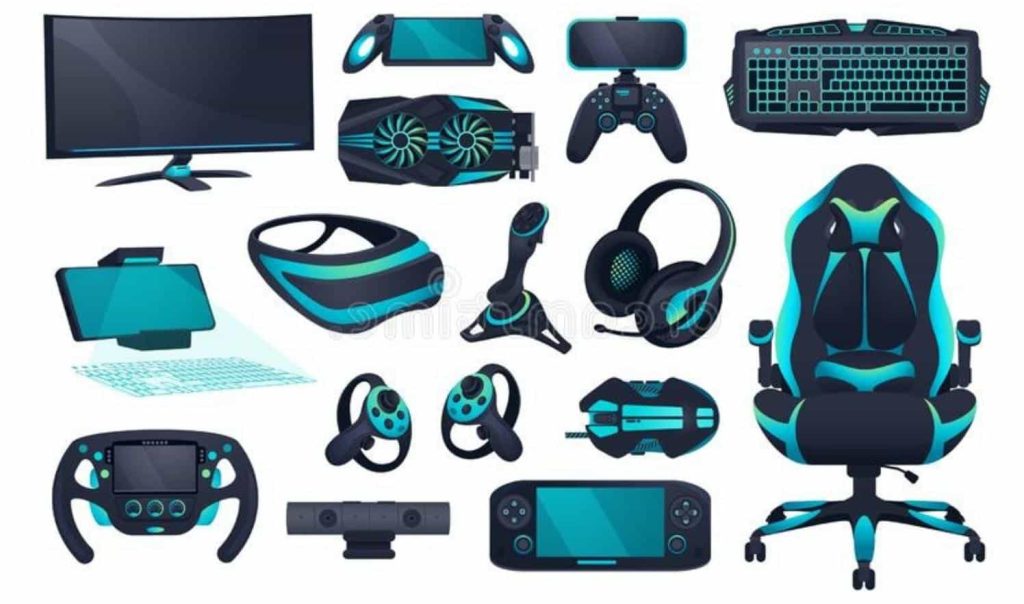
PC gaming can be a great experience, but it can also be expensive. If you’re looking to build or upgrade your gaming PC, don’t forget the peripherals! Here are some of the most important ones:
The Gaming Mouse
A gaming mouse is essential for any PC gamer. Look for one with a high DPI (dots per inch) rating, as this will allow you to move the cursor around the screen quickly and accurately.
The Gaming Keyboard
It is also important. It should have backlighting so that you can see the keys in low-light conditions, and it should also have media controls so that you can easily control your music and videos.
The Gaming Headset
There are many different types of headsets on the market these days. A good headset for a gaming PC can provide great sound and comfort for hours of gaming. It is important to find a headset that is compatible with your computer and has all the features you need.
The Gaming Monitor
In order to get the most out of your gaming PC, it’s important to have a quality monitor. Many gamers make the mistake of thinking that any old monitor will do, but this simply isn’t the case. A good gaming monitor will have features that are specifically designed to improve your gaming experience.
One of the most important things to look for in a gaming monitor is fast response time. This is the amount of time it takes for the pixels on the screen to change from black to white or from one color to another. If you have a slow response time, you may experience what is known as “screen tearing”, which can be very distracting and can ruin your gameplay experience.
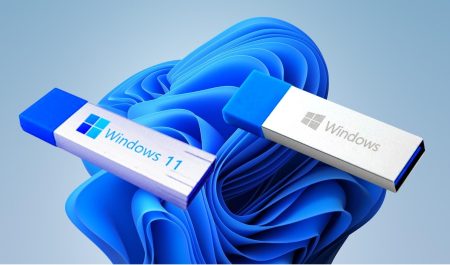
12. Latest Operating OS
An operating system (OS) is a set of software that manages computer hardware and software resources and provides common services for computer programs. The most common type of OS is the Linux kernel, which is used in desktop, server, mobile, and embedded systems. Other popular OSes include Microsoft Windows and macOS.
How to Build a Gaming PC – Step by Step Guide
Now that you’ve examined all of the PC components for constructing a gaming PC? It doesn’t matter if you are an experienced PC builder searching for a refresher course or a newcomer. In any case, this article will walk you through the process of building your very own gaming PC from the ground up!
Simple Steps to Build a Gaming PC
Once you have your hardware, it’s time to assemble your computer! This process is actually very simple and can be done in under an hour. Just follow these steps:
STEP 1: Installing CPU on a Motherboard
Unbox your CPU (Intel/AMD) and motherboard gently on a non-conductive table. On the motherboard, you’ll notice a plastic socket covering your CPU placement, which we need to remove and lift the tension lever for the CPU, so that you may put the processor in place of the CPU socket.
There is also a difference in processors; on Intel builds, the pins are located on the socket, but on AMD versions, the pins are located on the CPU. Match the arrow/triangle on the top of the CPU to your motherboard, then drop the CPU in place and don’t force it, only correct in the socket to correctly align and press the tension lever back down.
You should be aware that if you are looking for large gaming rigs, you may need to know more than simple builds. This is because popular platforms, such as AMD’s (AM4 socket) and Intel’s (socket LGA 1200) are the standard setups. Intel’s Core X (LGA 2066) is the socket for high-end gamers and enthusiasts, similarly, AMD’s Threadripper (sTRX4) platform sockets may require more sophisticated CPU installation than standard designs.
STEP 2: Installing CPU Cooler and Thermal Paste
This is the difficult portion when it comes to precautions, advice, and assurance that you will not damage your PC hardware by doing the incorrect thing. After the CPU is in place, you will need a cooling system, which may be included in your PC parts list; if liquid cooling is not available, a fan CPU cooler is an excellent option for building your first PC.
If you have a stock cooler that came with the CPU, you’ll notice that thermal paste has already been applied. If you’re using an aftermarket cooler, you’ll almost always need to apply your own thermal paste. To apply the thermal paste, do what we said before and make either a pea-sized drop in the middle or draw a straight line, not too thick or thin, and probably not too long to the edge, just between the center.
Once you’ve applied the paste in the middle of the CPU IHS, place the cooler on top to distribute it evenly. Here, PC build veterans may utilize a thermal spreader to distribute the paste, although the thermal compound doesn’t compulsory to be spread by tools. You’ll be alright with a pea drop and not too much to the surrounding PCB and other potentially dangerous components.
When installing a cooler, utilize push pins that pass through holes in the motherboard. Avoid placing unequal strain on one side of the CPU. Despite the fact that our preferred AMD stock coolers feature metal arms that clip into notches on a plastic bracket on either side of the socket. Tighten the mounting screws on the cooler’s backplate, which must be positioned behind the motherboard.
STEP 3: Installing Gaming RAM
This is the following step after placing your CPU into the motherboard socket and covering it with a cooler. We must load the RAM slots one by one but in the correct order. This may appear to be the simplest of all stages, but you will need to acquire a technique to snap RAM chips firmly in the correct slot for the correct quantity of memory from the correct type or generation of RAM.
After you’ve unlocked your latches, examine each DIMM and place it over the slot corresponding to the middle bump on the board. Then simply push down the RAM on each edge until it snaps into place, It will force the latches to close on their own and hold RAM in place.
If you’re installing two RAM sticks, you’ll need to use an odd configuration. This will be determined by your motherboard’s documentation, although it is usually a 1 and 3 slot configuration. If you’re filling four RAM slots with four RAM modules, there’s no strategy; simply snap them in place and you’re done.
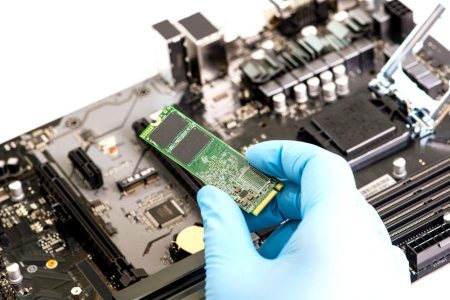
STEP 4: Add M.2 SSDs to Motherboard
This step is optional for some, although enthusiasts prefer having a faster M.2 SSD onboard for speedier bootups with the standard OS. This permits your PC to make a difference in day-to-day usage, and it is also the best time to install, since other parts may get in the way when we move with further PC building.
To begin, locate the M.2 slot on your motherboard; it is a horizontal slot flat on the board with a little screw on either side. Simply detach it and take care not to lose it. Slide the M.2 SSD into the slot gently. When it’s entirely installed, it will protrude at an angle, indicating that you need to sew it to secure it in place and settle it down.
STEP 5: Testing Initial Setup
When you have a processor, RAM, and M.2 SSD installed, you may connect your GPU to the motherboard and run a test for inquiry. While your motherboard is outside the casing, you will need to test drive it before you continue with the next step.
This requires connecting a GPU (if there isn’t one built-in), a power supply, and a PC display. Performing a brief test run of your components ensures they all work, which will save you headaches later when everything is enclosed in the PC case. You will see that everything in the motherboard is stable, functional, and appropriately positioned.
The testing step will satisfy your efforts when building your own PC. It implies that you are assuring that there will be no problems with the process and that if an issue occurs, you will be able to remedy it before it is too late. As a result, a test drive for your PC with all of its fundamental components linked to its motherboard is needed.
STEP 6: Assemble your Motherboard in the Case (Fittings)
When inserting the motherboard into the casing, use caution and precision. This also means that the build is getting close to completion, which necessitates some case preparation, such as removing the side panels, clearing the apertures, and unscrewing the lid.
Most cases utilize thumbscrews to secure their panels in place, making it easy to remove them. Others employ a latch, which is a much easier approach for accessing internals when upgrading or creating a gaming PC from scratch. When putting the motherboard in the case, make sure it’s horizontal on the surface.
As shown in the image, attach it to the I/O shield. Your motherboard will have a backplate to help you install it in the case; make sure you don’t place it incorrectly since we need to fit the PSU in the next step, which has to be placed right in the backspace of the case or beneath the motherboard if it’s an ATX case. Moving it inside in position necessitates patience, and once done, screw it into the case using the screws that came with it.
STEP 7: Mounting the Power Supply Unit (PSU)
Now that our build is virtually finished (except for the graphics card, which we’ll do later), it’s time to install a power supply in the cage. This normally takes its place naturally, depending on the case; you’ll notice the PSU location with the side opening. Once you’ve found a suitable location, take your power supply out of the box, stretch out its cords, and install it.
In most cases, it’s as simple as fastening it into place using four screws at the rear of the casing. Just make sure it’s oriented correctly and that the vents are unobstructed so that cool air can flow through. When it’s up and running, connect the 24-pin power connection and the additional CPU power connector to the motherboard. You have completed this section.
However, be cautious about the sort of power supply you choose. PC components have rated power, which necessitates the use of a higher, moderate, or extremely hefty power supply unit to feed the components. Always keep an eye out for how much power your PC parts are rated to receive, as well as if your power supply is enough for overclocking and SLI GPUs.
STEP 8: Installing Dedicated GPU
This is the prerequisite for a gaming PC to have a strong dedicated GPU, whether from AMD (Radeon 7900XT), Nvidia (RTX 4090), or Intel’s (Arc Alchemist) series of graphics cards for any serious gaming with AAA titles without sacrificing frame rates.
To outfit your eGPU, you’ll need PCI-Express X16 slots. Depending on what the manufacturer wants us to use, this might be an SLI or a single unit graphics card. You can simply attach the GPU to the motherboard by plugging it into any PCI-e port. After that, connect the connection wires to the power supply and the motherboard.
Your build is now complete for what it requires to run and prosper without any fancy tweaks. However, you will probably need to take some extra steps to populate your HDMI, DVI, and other connections in order to attach your monitor and finish it without making a terrible impression.
Additional Steps to Finish the Build:
- STEP 9: If your motherboard does not feature the newest WiFi6 or later, connect your Wi-Fi card.
- STEP 10: You must ensure that the PC case cable connections for fans and front-panel ports are pugged.
- STEP 11: Install your 2.5-inch and 3.5-inch HDDs, as well as any additional SSDs for game storage.
- STEP 12: Finally, install the most recent version of Windows 11 or another (OS) operating system.
Conclusion
Building a custom gaming PC is a great way to get the most out of your gaming experience. By choosing the best components and assembling them yourself, you can create a machine that is perfectly tailored to your needs. However, building a custom gaming PC can be a daunting task, especially for beginners. If you’re not sure where to start or you don’t have the time or skills to do it yourself, there are plenty of companies that offer pre-build custom gaming PCs. These PCs often offer good value for your money and can be configured to meet your specific needs. So, whether you decide to build your own PC or buy one pre-built, a custom gaming PC is the best way to get the most out of your gaming experience.
Frequently Asked Questions
What are the benefits of a gaming PC?
A gaming PC provides a number of benefits for gamers. Perhaps the most obvious benefit is that a gaming PC can handle the most demanding games on the market. Additionally, gaming PCs typically have better graphics and sound capabilities than traditional laptops or desktop computers, making them better suited for gaming. Some gamers also prefer gaming PCs because they can be customized to meet the player’s specific needs or preferences. For example, gamers can choose different components such as graphics cards, processors, and memory to create a system that is perfect for their individual gaming style. Finally, gaming PCs are often cheaper than high-end consoles such as the Xbox One X or PlayStation 4 Pro, making them an affordable option for those who want to get the best possible gaming experience.
What are the best gaming processors?
Gaming processors have come a long way in a short amount of time. What once required a bulky desktop PC can now be done with a laptop. The key to any great gaming experience is the processor. So, what are the best gaming processors on the market today? The Ryzen 9 3950X is currently the best gaming processor on the market. It offers 16 cores and 32 threads, making it perfect for multitasking. It also has a boost clock of 4.7GHz, ensuring that you’ll get the most out of your games. If you’re looking for something a bit more affordable, the Intel Core i9-9900K is an excellent option. It offers 8 cores and 16 threads, as well as a boost clock of 5GHz.
How much cheaper is it to build a gaming PC?
Building your own gaming PC is much cheaper than buying a pre-built desktop. You can save hundreds of dollars by selecting your own parts and assembling the PC yourself. The most important factor in determining how much you’ll save is the graphics card. A high-end card can cost $500 or more, but you can find a good one for around $200 if you build the PC yourself. Other components, such as the processor, motherboard, and memory, are also cheaper when bought separately. If you have some experience with computers and are comfortable with building your own system, then building a gaming PC is definitely the way to go.
Is it hard to build a gaming PC?
Building a gaming PC can be a daunting task for first-timers. There are many components that need to be considered when building a gaming PC, such as the CPU, GPU, motherboard, and RAM. Building a gaming PC also requires some technical knowledge and experience in order to ensure that all the components are compatible with each other. However, with the right tools and resources, it is not too hard to build a gaming PC. There are many online resources available that can walk you through the entire process of building a gaming PC. There are also various online forums where you can ask questions if you run into any problems while building your PC. If you are not comfortable building your own PC, there are also many companies that offer pre-built gaming PCs. These pre-built gaming PCs often come with warranties and support from the company if anything goes wrong.
What parts do I need to build a gaming PC?
Building your own gaming PC can be a fun and rewarding experience, but it can also be daunting for those who are new to the process. So, what do you need in order to build your own gaming PC? To start with, you’ll need a motherboard, a processor, RAM, a graphics card, a power supply unit (PSU), a case, and an operating system. The most important of these components is the motherboard, as it determines not only which other components you can use, but also how well they will work together. When choosing a motherboard, you’ll need to decide on the form factor (ATX, micro-ATX, or mini-ITX), the number of PCIe slots available, and the type of socket that your processor uses.